
How to Add Creative Ghost to Your Facebook Business Admin Team
- Kaycee Johnson

- Mar 30
- 3 min read
A step-by-step guide for small business owners
Before we can manage your Facebook Page, run ads, or post on your behalf, we need to be added to your Business Portfolio (formerly Business Manager) with the right permissions. This is a quick, one-time setup — and you stay in full control of your account the whole time.
Here's exactly how to do it.
What You'll Need
Access to your Facebook account (the one connected to your Business Page)
Your Business Portfolio set up in Meta Business Suite (more on this below if you haven't done it yet)
Creative Ghost's Business ID: 144375248128119

Step 1: Make Sure You Have a Business Portfolio
If you manage your Facebook Page directly from your personal profile and have never used Meta Business Suite, you'll need to set up a Business Portfolio first.
Go to business.facebook.com and follow the prompts to create one. You'll connect your existing Page during setup.
If you're not sure whether you already have one, head to that link — if it takes you to a dashboard with your Page listed, you're good to go!
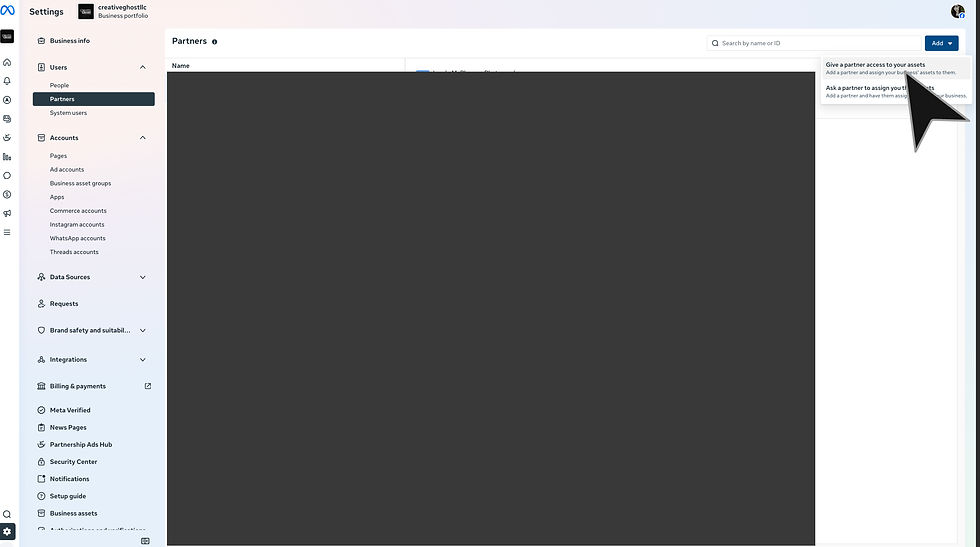
Step 2: Open Your Business Settings
From Meta Business Suite, click the Settings gear icon in the bottom-left corner of the sidebar, then select Users > Partners. This is your control panel for everything related to who has access to your account.

Step 3: Add Creative Ghost as a Partner
In Business Settings, look for the Partners section in the left-hand menu (it may be listed under "Users"). Click Add, then choose "Give a partner access to your assets."
You'll be asked to enter a Partner Business ID.
Enter Creative Ghost's ID: 144375248128119
Click Next.
Step 4: Assign the Right Assets and Permissions
This is where you choose what Creative Ghost can access. You'll see a list of your assets — Pages, ad accounts, Instagram accounts, etc. Here's what to assign:
For social media management (posting, scheduling, inbox): Select your Facebook Page and assign the "Content creator" or "Moderator" role, depending on what we've discussed. If we're handling your full social presence, Admin access is needed.
For running Facebook/Instagram ads: Select your Ad Account and assign the "Advertiser" role. This allows us to build, launch, and manage campaigns without being able to change billing information.
If you haven't created a dedicated Ad Account yet, you can do that inside Business Settings under Ad Accounts → Add → Create a new ad account.
Step 5: Confirm and You're Done
Click Save Changes. Creative Ghost will receive a notification on our end and can begin accessing the assigned assets right away.
You'll be able to see us listed under your Partners at any time, and you can adjust or remove access whenever you need to — no hoops to jump through.
A Few Things to Know
You are always the owner of your Page and ad account.
Adding us as a partner does not give us the ability to remove you, change your billing, or access anything outside of what you've assigned.
We recommend keeping your own login credentials private and never sharing your personal Facebook password with anyone.
If you run into any snags during setup, just reach out and we'll walk you through it — or we can schedule a quick screen share to do it together!


Comments